Flask Controlled WS2812b LED Strip
Published on: September 12, 2020
Welcome to the 18th Raspberry Pi Video. Like a few of my previous videos, this is more of a demo than a tutorial. It's a project I've wanted to do for a while and it's still a work in progress so you can expect to see a few updates to this over the coming year. The project is a Flask Controlled WS2812b app. This builds on the videos I've done on DancyPi and AIIM.
Before I move any further, I want to mention that this post has a sponsor! I don't normally take sponsors because finding something relevant is hard. But as someone who loves to teach programming, a coding bootcamp is perfect. So this post is brought to you by Eleven Fifty Academy. They offer coding bootcamps to those who want to start a carrer in software development. Their curriculum is designed to jump start your career. I checked them out and knowthat they genuinely want to help people get into the tech world. If that's something that interests you then check them out and read about how much you can make after coding bootcamp on their blog: https://elevenfifty.org/how-much-can-you-make-after-coding-bootcamp/
Back to talking about LEDs. Most of what you need to follow is in the GitHub repository: https://github.com/naztronaut/FCW
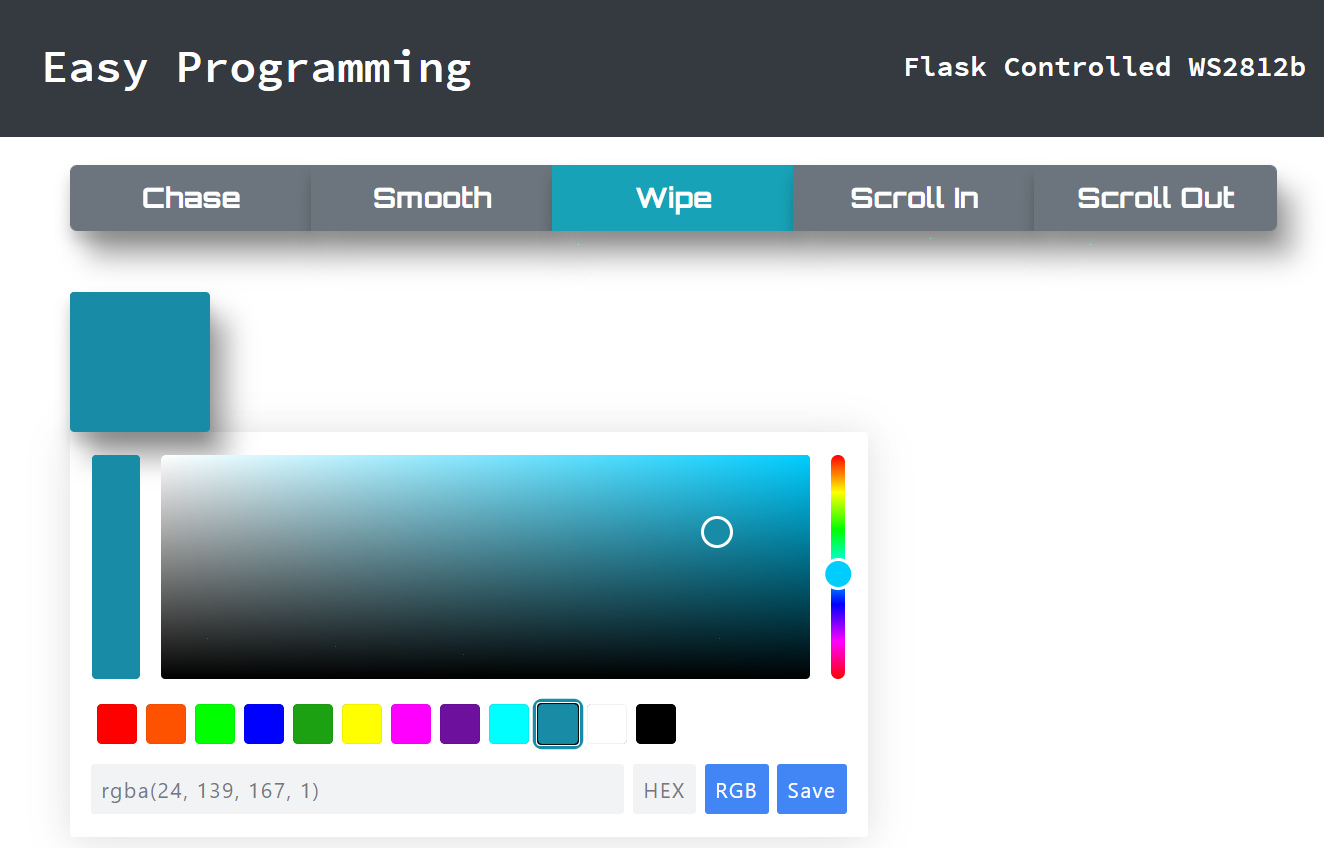
If everything goes well, then you should be able to see the following happen controlled by the UI below:

Hardware Setup
Let's talk hardware first. Here is what I used for my project (same list as the last project):
- Raspberry Pi - Any will work, in my demo I am using a Pi Zero W
- WS2812b LED - can be a strip or in any basic series. You should know the number of LEDs in the series. These lights typically have 3 connections: Power, Ground, and Data
- Jumper cables - to connect the Pi to the lights
- Power - this can be supplied to the Pi and the Pi supplies power to the lights, or you can use two different power sources for the two components
Here's a quick fritz diagram of what the connection looks like:
By default, the project uses GPIO Pin 18 as the data pin with 5v and GND pins being any of the ones provided by the Pi. Find a quick the wiring below:

It's a pretty simple set up.
Software Setup
If you don't already have Git set up, install Git then clone the project repo and enter the isntall directory with these commands:
    sudo apt install git -y
    sudo git clone https://github.com/naztronaut/FCW.git
    sudo mv FCW fcw
    cd fcw/python/install
I added a quick install script that installs a lot of items for you:
- Pip3
- Venv
- Python Setup tools and libatlas
- rpi_ws281x
- Apache
- Mod WSGI
All of these are needed for the project to work and I did my best to automate the process. If you already have any of these installed then the installer will simply skip over them.
I do recommend doing everything in a virtual environment but it's not required. After you do the set up, you can look at config.py and edit the LED_COUNT value. By default it's 142 because that's what my light uses. It should be a multiple of 2. You can leave everything else as-is.
The rest of this is setting up Flask and Apache and if you've seen my previous tutorials, it's easy to do and I provide detailed steps on how to do so. You can check out the section on GitHub and also check out my previous tutorials on Flask: https://github.com/naztronaut/FCW#install-and-run-flask
Tutorials on Flask:
How to turn your RPi into a Flask App Server
Run Flask behind Apache
Running the Watchdog Script
The one thing I'm struggling with at the moment is triggering a watchdog script to run in the background from the Flask app. So for this version, it requires you to login to your Pi and run a command to run led_watchdog.py:
sudo nohup python3 /var/www/html/fcw/led_watchdog.py >> /dev/null 2>&1 &
That script is what houses the animations for the LEDs. It also uses watchdog functionality to read the data in file/status.txt to determine what animations to do. So technically, the Flask app isn't even talking to this script directly. The flask app is writing to a file and this script is reading that file. This can also be done with a Database but I figured that was overkill. I also want to investigate using MQTT for this at some point as that may be easier but would require an MQTT server somewhere and MQTT client on the Pi.
To kill the script run this:
sudo pkill -f led_watchdog.py
Patreon
I do these projects to learn and teaching is a good way to learn. But if you do want to support me, head on over to Patreon and become a Patron: https://www.patreon.com/nazmus
If you've implemented this project, I'd like to see it! So please share it with me through any of my regular channels.
Remember to checkout the Resources section below for associated downloadable content, JSFiddle links, and other resources. Watch the video and follow along!
Resources:
Find the code on Github: https://github.com/naztronaut/FCW
