Set up PiVPN with PiHole and Raspberry Pi Zero W Giveaway
Published on: October 5, 2019
Welcome to the 11th Raspberry Pi Tutorial! I've finally settled after moving and am back to making more videos! In this tutorial, we are going to look at how to install PiVPN and then route all traffic through PiHole. I won't go through the setup of PiHole so if you are interested in how to set up PiHole, check out my other tutorial here: How to set up PiHole on Raspberry Pi
Installing PiVPN
After you've SSH'd into your Pi, run the following command to run the PiVPN setup:
curl -L https://install.pivpn.io | bash
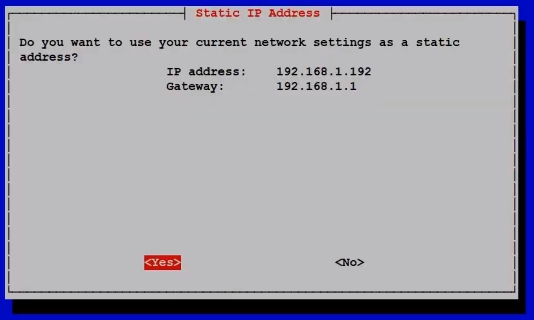
The installer will take a few minutes to update and install all dependencies and then take you to the PiVPN installation screen. You will then be warned about needing a Static IP. You should think about assigning your Pi's Mac Address a static internal IP. The following screen will show you your current internal IP address and gateway. Just confirm and move forward:

The next screen will ask you if you want unintended upgrades, I do recommend agreeing to this so that any security holes are patched as soon as possible. Once that's set up, you'll be asked about your protocol and Port number. I recommend keeping the protocol as UDP:

You'll then be asked to choose a port. By default, port 1194 is chosen but you don't have to keep this port! I'd actually recommend changing this from the default:

Once you have this set up, you should open your port on your router. There are thousands of router make and models out there, so I didn't take the time to show you how to port forward. I would recommend looking up your router on https://portforward.com/ and configure your settings.
As you go through the prompts, you'll be asked to choose a certificate size. You'll have the options between 256 and 521 bit. If you have the time, go paranoid and get the 521-bit certificate! Note that after this step, you may have to wait quite a while as your Pi generates the certificate.

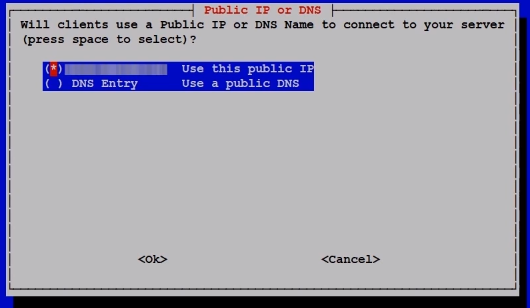
After the Cert is generated, your Pi will then detect your public IP addresss and display it for you as an option for connection. You can use the public IP or use a DNS entry. I recommend sticking to the IP for now, we'll set up our domain name in a little bit.

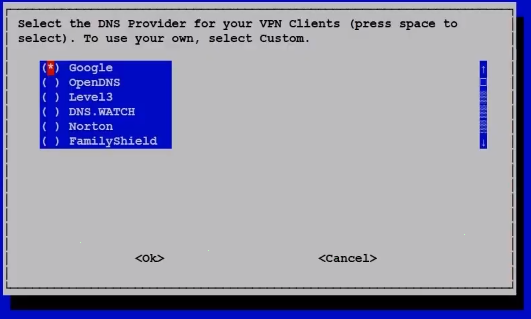
The following screen will ask you about which DNS providers you want to use. You can scroll all the way the way down, select custom, and enter your PiHole IP address. However, PiVPN may have a bug. I've noticed that oftentimes, selecting custom doesn't actually set the DNS, it just defaults to Google. But don't worry, Later on, I will show you how to manually push traffic thru your PiHole anyway.

The next two screens will ask you if you want to use a custom domain name. This is EXTREMELY helpful if you have a Dynamic external IP address. If your IP address changes and you don't have a domain, you'll have to change all of your VPN profiles as well as some server settings. But if you set up a domain name, all you need to do is alter the A-Record for your domain and you're good to go after a quick DNS cache catchup!
If you want to continue with Domain, note that I've had trouble using subdomains. I intially set up vpn.easyprogramming.net to point to my External IP, however it was deemed an invalid domain. So my workaround is to just do easyprogramming.net and then later on, I will change the domain in the default configurations:

This should be the last step you need to take before you have a functional PiVPN. Congratulations! But we're not done yet. After a quick reboot, let's change some configurations!
Configuring your PiVPN
Default Profile Settings:
First, let's change the domain name in the Defaults configuration file. Run the following command to edit the Default.txt file:
sudo nano /etc/openvpn/easy-rsa/pki/Default.txt
If you are having permissions issues, you may not have access to the pki directory. Run the following and then run the above command:
sudo chown pi:pi /etc/openvpn/easy-rsa/pki
In your Default.txt file, You will see a line that starts with `remote`. If you see an IP address there, change it to your domain as follows:
remote vpn.easyprogramming.net 1194
Note: Don't change the Port! Save the file and from now on, all newly created VPN profiles will use the domain name to connect!
Force PiHole DNS:
Now finally, let's configure our PiVPN to use our PiHole DNS instead. Edit the server.conf file:
sudo nano /etc/openvpn/server.conf
Scroll down and you should see a few options begining with "push" and it'll look like this:
# Set your primary domain name server address for clients
push "dhcp-option DOMAIN vpn.easyprogramming.net"
push "dhcp-option DNS 192.168.1.xx"
push "dhcp-option DNS 192.168.1.xx"
Change the DNS IP addresses to your PiHole IP addresses. If you have more than 2, just add more lines! Let's restart OpenVPN and from now on, all traffic through your PiVPN will go through your PiHole servers!
sudo service openvpn restart
Creating accounts:
I would recommend first looking at the help command to take a look at your available options:
pivpn -h
To create a new profile run:
pivpn -a nopass
The above option will not set a password for the profile. For small use cases, this is fine. But if you want to set a password, leave that out. You'll be asked to enter a name for the profile and voila, your profile has been created!
Export the file out of your PiVPN server and send it to any computer that needs to connect to your VPN. To see a demo of how to connect, I do recommend watching the video below starting at 10:31. Download the client here: https://openvpn.net/community-downloads/
Once you connect, you can take a look at a list of all connected clients with the following command:
pivpn -c
You can also check your PiHole logs to see the traffic go through your VPN! And you are done with this set up! It was a long tutorial, I apologize for all the words. If you have any questions, please ask! And if you've read the whole tutorial all the way through, you deserve a chance to win a Pi below! Best of luck!
Troubleshooting
If you are able to connect but for some reason have no internet, it could be a firewall issue. Try running the following command on your Pi for iptables then restart openvpn and try again:
iptables -t nat -A POSTROUTING -s 10.8.0.0/24 -o eth0 -j MASQUERADE
sudo service openvpn restart
To make the settings persist, you may have to login as root and save them using the following commands:
sudo iu -root
iptables-save >/etc/iptables/rules.v4
This will save the iptables to that rules.v4 file. And iptables-persistent will look at that file when it reboots. I've only found that it works if I login as root and then run the command, otherwise I got permission denied errors even when using sudo. Hope this bit is helpful to some!
Giveaway
Now if you're here about the giveaway, keep reading:
This is my fifth Raspberry Pi giveaway. Here are the official rules:
Here are a list of official rules:
- Only open to US residents (sorry, I will try to open it up internationally in the future)
- Comment anywhere in this video or on the video posted on EasyProgramming.net - It can be anything if you have a project in mind, I'd love to hear about it. It can even be setting up a PiVPN or PiHole :)
- Optional: Mention what state you are from.
- I will stop taking entries on October 30, 2019 11:59:59 PM EST and winners will be announced in the next tutorial
- That's all!
Past winners are welcome to try again! Comments on YouTube and EasyProgramming will earn you one entry each. Patrons on Patreon will get 5 entries per tier! Meaning you can get up to 15 entries on Patreon alone. Look to becoming a patron: https://www.patreon.com/nazmus.
Bonus entry can be made on the EP subreddit, so be on the lookout for that thread: https://www.reddit.com/r/EasyProgramming/
I apologize again for opening up to US residents only. Since I'm covering the costs myself, I need to be able to minimize costs so that give away more of these. International shipping is just so expensive! I do hope to open it to international folks at some point.
Enjoy the tutorial and good luck in the drawing!
Remember to checkout the Resources section below for associated downloadable content, JSFiddle links, and other resources. Watch the video and follow along!
Resources:
No resources from Easy Programming for this video! Follow me on Github for other resources https://github.com/naztronaut
